
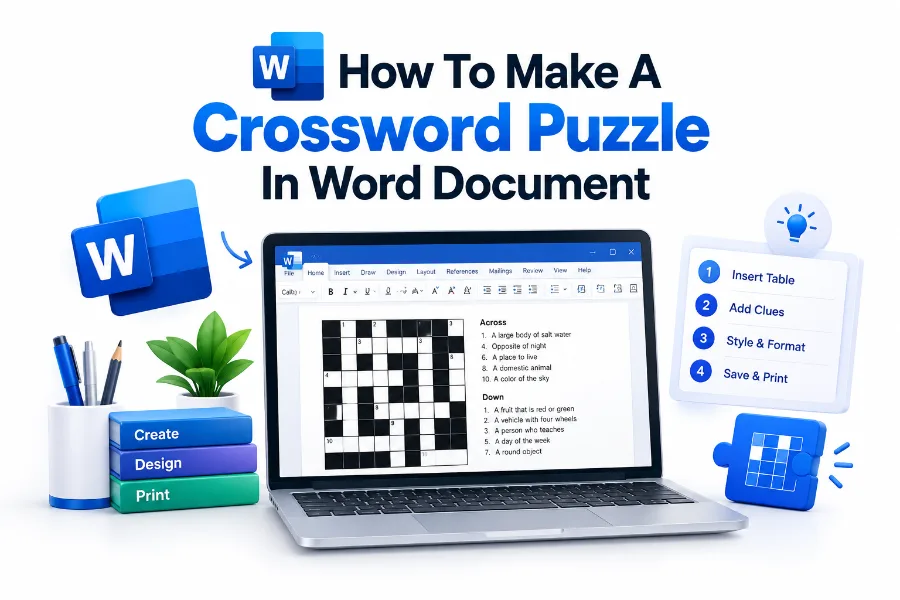
Creating a crossword puzzle in Microsoft Word is easier than it may seem. With the right table layout, a clear set of clues, and a little planning, you can produce a printable puzzle for a classroom, newsletter, family activity, or personal project. Word does not include a dedicated crossword generator, but its table, shading, border, and text tools provide everything needed for a professional result.
This guide explains how to make a crossword puzzle in word document from start to finish. You will learn how to plan the grid, build it with a table, add black squares, number the clues, format the answer areas, and prepare the finished puzzle for printing or sharing. The method works for simple beginner puzzles as well as larger themed designs. By following each stage carefully, you can create a neat crossword without relying on specialist software.
Planning the Crossword Puzzle
A successful crossword begins with preparation. Decide on the theme, target audience, puzzle size, and difficulty level before opening Word. A children’s puzzle may use familiar words and simple clues, while an adult puzzle can include wordplay, general knowledge, or subject-specific vocabulary.
Prepare a complete answer list before creating the grid. Check each word’s spelling and decide how the answers will cross. Avoid phrases containing spaces unless you plan to remove the spaces in the grid. A written answer list prevents repeated editing and makes the construction process much faster.
Choosing the Grid Size
The grid size determines how much space the puzzle needs and how challenging it will be to complete. A 10-by-10 grid is suitable for a quick activity, while a 15-by-15 grid provides more room for longer words and additional crossings.
For a first project, use a square grid with equal numbers of rows and columns. A simple layout is easier to format and print. Once you are comfortable with the process, you can create irregular shapes, themed sections, or larger grids with multiple answer patterns.
Useful planning points:
- Choose between 10-by-10, 12-by-12, or 15-by-15 squares.
- Select answers with different word lengths.
- Avoid using the same answer more than once.
- Check that every answer has at least one crossing.
- Keep a separate answer key for later testing.
Building the Grid in Word
Open a blank Word document and place the cursor where you want the puzzle to appear. Select the Insert tab, choose Table, and create a grid with the required number of rows and columns. For example, a 12-by-12 crossword requires 12 rows and 12 columns.
The table will initially contain rectangular cells. Select the entire table and use the Table Layout options to set equal row height and column width. Square cells make the puzzle easier to read, fill in, and print. If the grid looks stretched, manually enter matching measurements for both dimensions.
Making the Cells Square
Select the full table, then open the Layout tab under Table Tools. Enter a fixed height for the rows and a matching width for the columns. A measurement between 0.35 and 0.5 inches usually works well for a standard printed worksheet.
Disable automatic resizing if Word changes the dimensions while you type. You may also need to open Table Properties and choose a fixed column width. Consistent cell sizes create a cleaner appearance and leave enough room for small clue numbers.
Grid setup checklist:
- Use one table for the complete puzzle.
- Set identical row and column measurements.
- Keep the table centered on the page.
- Use narrow margins if the puzzle is large.
- Leave space above the grid for a title and instructions.
Creating Black Squares
Crossword puzzles need blocked cells to separate answers. In Word, select the cells that should remain unused and apply black shading. You can do this from the Table Design tab by selecting Shading and choosing black or a very dark color.
After applying the shading, check that the borders remain visible around the white cells. If black squares appear uneven or contain unwanted text, select them again and remove all paragraph marks or spaces. Clean blocked cells produce a sharper printed design.
Using Borders Effectively
Borders define the puzzle’s structure and help solvers distinguish one cell from another. Select the table and choose a thin black border for all cells. A line between 0.5 and 1 point is generally clear without appearing too heavy.
For a polished worksheet, use slightly darker or thicker outside borders. You can also remove borders around black cells if you prefer a solid block effect. Always print a test page because some border settings may look different on screen and on paper.
Simple formatting tips:
- Use black shading for blocked cells.
- Keep white cells unshaded.
- Apply thin internal borders.
- Use a slightly thicker outside border.
- Check the grid at normal print size.
Adding Answers to the Grid
Once the structure is ready, enter the answers into the correct white cells. Type one letter per cell rather than pasting a full word into the first cell. This makes each answer align correctly and allows the crossing words to remain visible.
Use uppercase letters for a traditional crossword appearance. Center the text horizontally and vertically so every letter sits neatly in its square. A readable font such as Arial, Calibri, or Times New Roman works well, although a clean sans-serif font is usually easier for younger solvers.
Adjusting Letter Appearance
Select the letter cells and choose a font size that fits comfortably. For a grid with small cells, 8- or 9-point text may be appropriate. For a larger worksheet, 11- or 12-point letters provide better readability.
Keep the font consistent throughout the puzzle. If you are preparing an answer key, use the same grid and formatting, then add the letters to a duplicate copy. This creates a matching solution sheet and reduces the risk of answer placement errors.
Answer formatting checklist:
- Type one letter in each cell.
- Use uppercase letters consistently.
- Center letters horizontally and vertically.
- Check every crossing for accuracy.
- Save a separate answer-key version.
Numbering the Starting Cells
Each answer needs a number in its starting cell. A cell receives an Across number if it begins a horizontal answer, and a Down number if it begins a vertical answer. Some cells receive both numbers when they start answers in both directions.
To add a number, click inside the appropriate cell and type a small number before the answer letter. Reduce the number’s font size and use superscript or top alignment if necessary. The number should remain visible without making the main letter difficult to read.
Positioning Clue Numbers
Word tables can be difficult to format when a cell contains both a clue number and a letter. One practical method is to place the number in the upper-left corner and the answer letter near the center. Use paragraph spacing, superscript, or a smaller font to separate the two elements.
Test several cells before numbering the entire grid. If the numbers crowd the letters, reduce the letter size slightly or use a line break within the cell. Consistency matters more than any single formatting technique.
Numbering rules:
- Number cells from left to right and top to bottom.
- Use one sequence for both Across and Down clues.
- Give a cell one number if it starts both directions.
- Skip cells that begin no answer.
- Confirm that every clue number appears in the grid.
Writing the Across and Down Clues
Create two clue lists below or beside the grid. Label one section Across and the other Down. List the clue number followed by a clear definition or prompt. Keep the wording concise enough to fit comfortably on the page.
Clues should match the puzzle’s intended difficulty. A beginner clue might say “A young dog,” while a more advanced clue could use a synonym, wordplay, or indirect reference. Avoid clues with multiple possible answers unless the crossings make the solution obvious.
Making Clues Fair and Useful
A good clue gives solvers enough information to make progress without revealing the answer immediately. Include grammatical details when they matter, such as plural nouns, past-tense verbs, or abbreviations. If an answer is a proper name or abbreviation, make that clear in the clue.
Review every clue for ambiguity. If two answers could reasonably fit the same wording, revise the clue or change one of the entries. Fair clues build confidence and make the finished puzzle feel carefully designed.
Clue-writing suggestions:
- Match the clue’s wording to the answer’s part of speech.
- Identify abbreviations when necessary.
- Avoid obscure references for beginner puzzles.
- Use theme-related clues where appropriate.
- Test clues with someone unfamiliar with the answers.
Adding a Title and Instructions
Place a clear title above the puzzle. The title may refer to the theme, occasion, subject, or difficulty level. For example, “Winter Vocabulary Crossword” immediately tells readers what kind of activity they are about to complete.
Add a short instruction below the title, such as “Fill in the grid using the Across and Down clues.” If answers should be written without spaces or punctuation, mention that in the instructions. Simple directions prevent confusion, especially when the puzzle is used in a classroom or group activity.
Improving the Page Layout
Use the Layout tab to choose suitable page margins and orientation. A portrait page works well for small grids with clues below. Landscape orientation may be better for a wider grid with Across and Down clues arranged in two columns.
Keep the puzzle visually balanced. Avoid placing the grid too close to the page edge, and make sure the clue lists do not split awkwardly across pages. Use page breaks deliberately if the answer key or instructions need to appear on a separate page.
Layout decisions to check:
- Choose portrait or landscape orientation.
- Keep the title aligned with the grid.
- Leave enough white space around the table.
- Prevent clue lists from breaking in the middle.
- Keep the puzzle and instructions together when possible.
Using Columns for Clue Lists
If the clues take up too much vertical space, place them in two columns. One option is to use Word’s Columns feature for the entire clue section. Another is to create a separate borderless table with Across in one cell and Down in another.
A borderless two-column table often provides better control because each list stays in its own area. Make sure the column widths allow long clues to wrap naturally. Avoid shrinking the font too much, since clues should remain comfortable to read.
Including a Theme
A theme gives the puzzle a stronger identity and helps solvers predict related answers. Themes can include holidays, school subjects, travel destinations, hobbies, films, food, or workplace vocabulary. Choose a theme broad enough to support several answers.
Place the theme in the title or opening instruction, but do not make every clue identical in style. A mixture of direct definitions and theme references creates variety. If the theme is difficult, include a short hint to make the puzzle more approachable.
Checking Crossword Accuracy
Before sharing the puzzle, solve it from the beginning as if you were a reader. Use only the clues and the partially completed grid. This test may reveal unclear clues, spelling errors, missing numbers, or answers that do not cross correctly.
Compare every letter where two answers intersect. A single incorrect character can affect multiple entries and make the puzzle impossible to complete. Check the answer key separately, then save the document after corrections.
Final testing checklist:
- Solve the puzzle without looking at the answers.
- Verify every Across entry.
- Verify every Down entry.
- Check all crossing letters.
- Confirm that clue numbers match the grid.
- Print a proof copy.
Creating a Separate Answer Key
Save the completed puzzle before creating the solution sheet. Use Save As and give the duplicate a clear name, such as “Vocabulary Crossword Answer Key.” This protects the blank version and makes future edits easier.
In the answer-key copy, keep the same title, clues, and page layout. The filled letters should be visible in every answer cell. You may use a different letter color, but black text is usually safest for printing and photocopying.
Protecting the Blank Puzzle
Once the blank puzzle is finished, save an editable master copy. You can then create PDF files for distribution while preserving the original Word version for later changes. A PDF prevents accidental edits and usually maintains the table layout more reliably.
Use clear file names that include the topic and version. For example, “Science Terms Crossword Blank” and “Science Terms Crossword Answers” are easier to manage than generic names such as “Puzzle Final.” Keep the blank and answer-key files in the same folder.
File management tips:
- Save an editable Word master.
- Export a PDF for sharing.
- Keep the answer key separate.
- Use descriptive file names.
- Store older versions only when they may be useful.
Printing the Crossword
Before printing multiple copies, select a high-quality printer setting and examine the preview. Make sure no rows or clue sections are cut off. If the grid appears too small, adjust the page margins or reduce unnecessary spacing around the title.
Print one test copy on the paper you plan to use. Check whether the letters, clue numbers, borders, and shaded squares remain clear. For classroom handouts, slightly heavier paper can improve durability, especially when students use pencils or colored pens.
Sharing the Puzzle Digitally
If the puzzle will be shared online, export it as a PDF. This keeps the grid stable across different devices and prevents fonts or table widths from changing. Attach the answer key separately rather than placing it immediately after the blank puzzle.
For editable group activities, provide the Word file only when participants need to type directly into the document. Otherwise, PDF format offers a cleaner and more predictable reading experience. Test the file on another device before sending it.
Making the Puzzle Fillable
A digital crossword can be made easier to complete by adding text boxes or using shaded table cells where users can type letters. However, complex fillable layouts may take more time to format than a printable design.
For a straightforward digital version, leave the white cells blank and instruct users to click each cell before typing. Set the table alignment and font size carefully so typed letters stay centered. Protect the document only after testing the typing behavior.
Troubleshooting Common Problems
If the table keeps changing size, open Table Properties and set fixed row height and column width. If letters move out of position, adjust cell alignment from the Layout tab. If black squares print gray, choose a darker fill and check the printer’s quality settings.
When clue numbers appear too large, select only the numbers and reduce their font size. If the puzzle spills onto a second page, change orientation, narrow the margins, or reduce spacing before the clues. Small adjustments usually solve layout problems without rebuilding the grid.
Common fixes:
- Lock row and column measurements.
- Center text vertically and horizontally.
- Remove extra paragraph marks from cells.
- Use fixed table positioning when needed.
- Preview before printing the final batch.
Using a Crossword Template
A Word crossword template can save time when you need a basic layout quickly. Templates may already include a title area, table grid, clue sections, and answer-key formatting. However, inspect the template carefully before adding your content.
Some templates contain inconsistent cell sizes, unnecessary borders, or outdated formatting. Treat the template as a starting point rather than a finished solution. Replace the sample answers, verify the numbering, and test the final document just as you would with a blank file.
Creating Larger and More Advanced Puzzles
For a larger puzzle, divide the work into stages. Build the grid first, place the longest answers, add crossing words, then fill the remaining sections with shorter entries. Long answers usually determine the shape of the puzzle, so placing them early gives you more control.
Advanced puzzles may include symmetrical block patterns, hidden themes, or clue types such as anagrams and double meanings. These features require additional testing because solvers need consistent signals. Use them only when they suit the audience and the intended difficulty.
Improving Accessibility and Readability
A readable crossword should work for people with different levels of vision, attention, and reading ability. Use strong contrast between white cells and black squares, avoid decorative fonts, and keep clues large enough to read comfortably.
If the puzzle is used in an educational setting, consider providing a larger-print version or a digital copy. You can also offer a word bank for beginners. Accessibility choices do not reduce the quality of the puzzle; they make it useful to more readers.
Best practices for accessibility:
- Use high-contrast colors.
- Avoid overly small clue text.
- Choose a simple, readable font.
- Provide clear instructions.
- Offer a larger-print version when needed.
Ways to Make the Activity More Engaging
A crossword becomes more memorable when it connects to a real purpose. Use vocabulary from a recent lesson, clues about a local event, or answers related to a celebration. A small theme can make the activity feel personal rather than generic.
You can also add a completion goal, such as a timed challenge, partner-solving activity, or review exercise. Keep the design uncluttered so the puzzle remains the main focus. Decorative elements should support the theme without competing with the grid or clues.
Conclusion
A well-made crossword depends on careful planning, accurate answers, consistent formatting, and thorough testing. Microsoft Word provides enough control to create a polished puzzle using tables, cell shading, borders, text alignment, and standard page-layout tools. You can build a simple worksheet for children or a more detailed themed puzzle for adults by adjusting the grid size, clue style, and presentation.
The most reliable process is to prepare the answer list first, construct a square grid, place and verify the entries, add clue numbers, write fair clues, and test the completed file before sharing it. Saving both an editable master and a PDF version makes future updates easier. With these techniques, how to make a crossword puzzle in word document becomes a practical skill you can use for lessons, newsletters, events, and personal projects.
FAQ
What is the easiest way to create a crossword in Word?
The easiest method is to insert a table, make the cells square, shade unused cells black, and place one answer letter in each white cell. Add small clue numbers and write Across and Down clues beneath the grid.
Can Word generate crossword puzzles automatically?
Microsoft Word does not include a dedicated crossword generator. You can create the grid manually with table tools or use an outside generator to plan the layout, then copy the finished structure into Word for formatting.
How large should a Word crossword grid be?
A 10-by-10 grid works well for short beginner puzzles, while a 15-by-15 grid allows more answers and greater difficulty. Choose the size according to the answer lengths, page space, and age of your audience.
How do I number crossword squares in Word?
Number only the cells that begin an Across or Down answer. Type a small number in the upper-left area of the cell, then place the answer letter in the center. A cell starting both directions uses one shared number.
How can I print a crossword clearly from Word?
Use square cells, high-contrast shading, readable clue text, and thin but visible borders. Preview the document, print one proof copy, and adjust margins or page orientation if the grid or clues appear cramped.
0 Comments